1) Doypacks – extendible bottom – logger inside
For PicoVACQ with thread
The H frame positioning kit includes an H frame structure with nuts and wing nuts. At the center of the frame, a thread maintains the logger. It is used across the wall.
- Fix the H frame on the bottom of the doypack from the outside, after having made 4 holes in the bottom with an awl.
- Maintain the device with the wing nuts.
- Pierce the bottom of the doypack and insert the thread of the H frame.
- Scew the logger on the thread from inside the doypack.
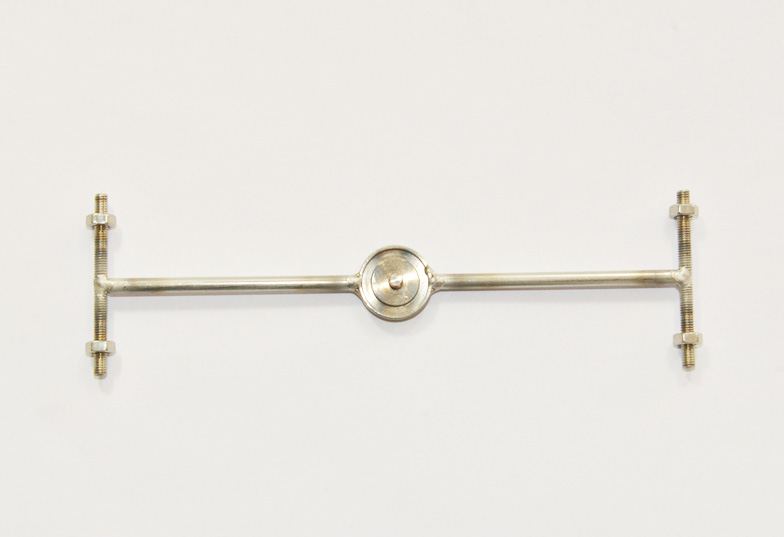
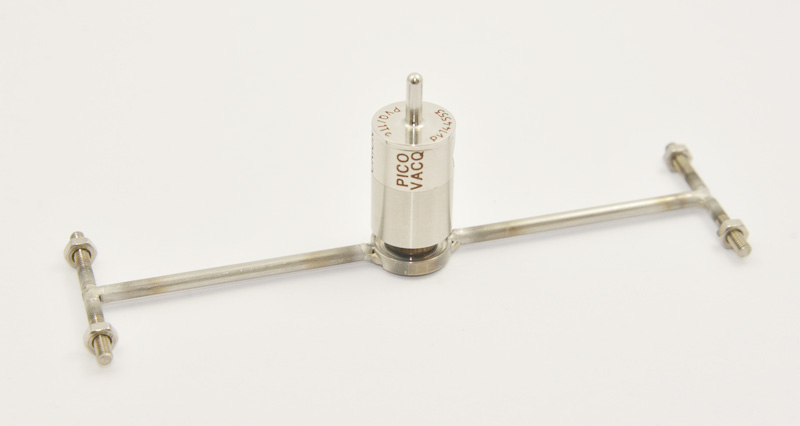
Assembly with H frame positioning kit.
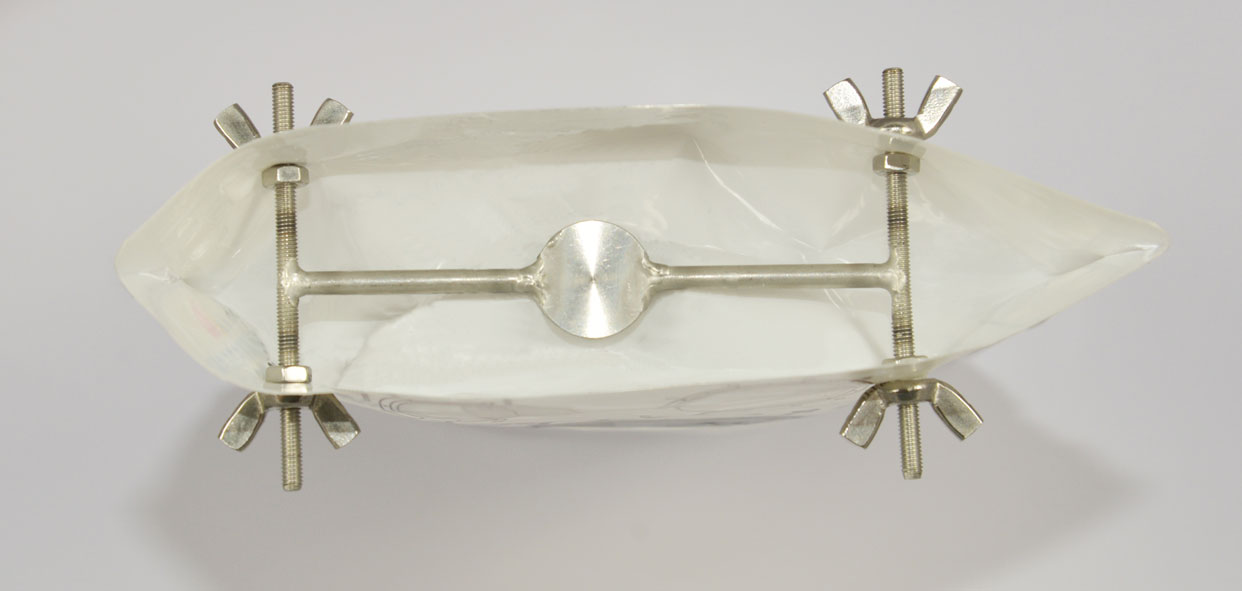
2) Flat doypacks and pouches – logger outside
For NanoVACQ Flat Needle, PicoVACQ 1Tand NanoVACQ 1Td with threaded rod.
The Bell shaped positioning kit includes a sheath with a thermowell and a structure that follows the shape and dimensions of the doypack or pouch.
For use across the wall :
- Insert the structure in the doypack or pouch.
- Place the o-ring on the thermowell.
- Pierce the wall of the pouch and screw the thermowell in the nut of the frame.
- Insert the logger probe in the sheath, with or without spacers.

Assembly with Bell shaped positioning kit.
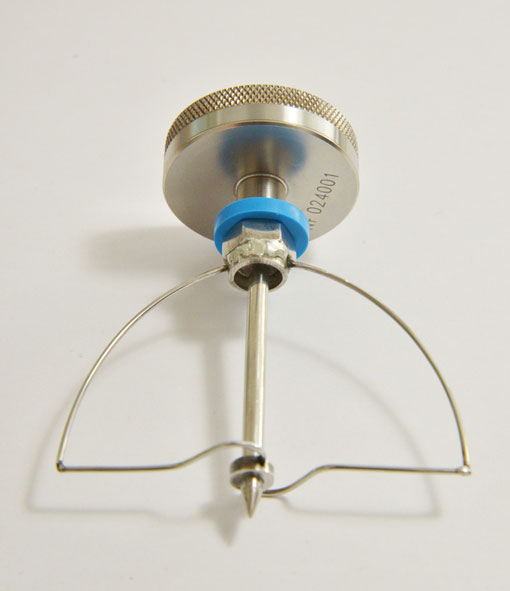
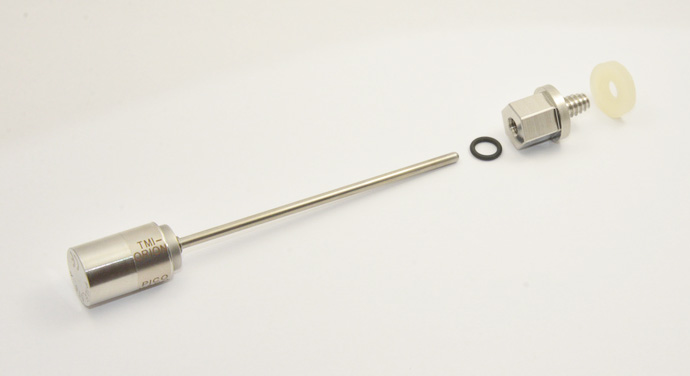
3) Soft flask with cap – logger outside
For NanoVACQ Flat Needle, PicoVACQ 1Tand NanoVACQ 1Td with threaded rod.
The device includes a Self-drilling screw for PicoVACQ and NanoVACQ (TMI0001_01), a silicon joint (TMI00001_04) and an o-ring. It fits on the cap of the soft flask.
- Pre-pierce the cap with an awl.
- Place the silicon joint on the cap.
- Screw and tighten the self-drilling screw.
- Place an o-ring on the logger, then insert the logger probe in the self-drilling screw.
.jpg)
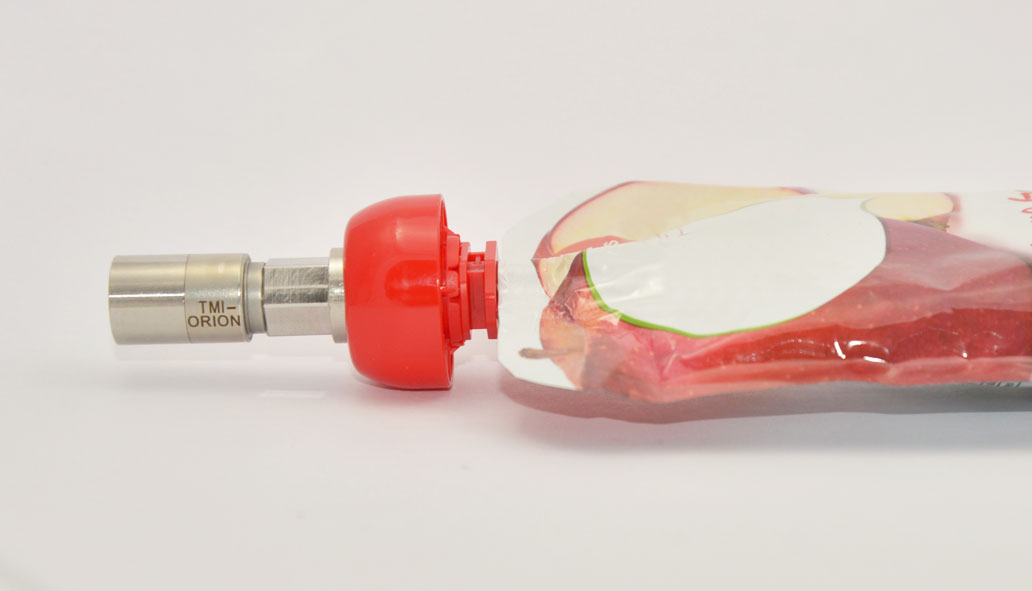
Assemby with a Self-drilling screw for PicoVACQ and NanoVACQ (TMI0001_01), a silicon joint (TMI00001_04) and an o-ring.
.